


This article relates to v2 machines only and guides you through the process of either:
- Replacing an existing battery; or
- Installing a battery into a machine – This is typically where your machine had an external battery & you now want to install that battery or a new battery inside your machine. In this case, the machine will never have had a battery installed internally so the process is slightly different.
To determine if you have a v2 machine, please read this article here.
EQUIPMENT REQUIRED:
- Philips head screwdriver
- 1 x 7mm Hex nut driver or spanner key
- 2 x Silicone terminal covers or electrical tape
PROCEDURE:
Step 1: Remove the Purple Body from the machine. For more details about this step, please visit our KB Article: How to remove the body from your Spinfire Ball Machine
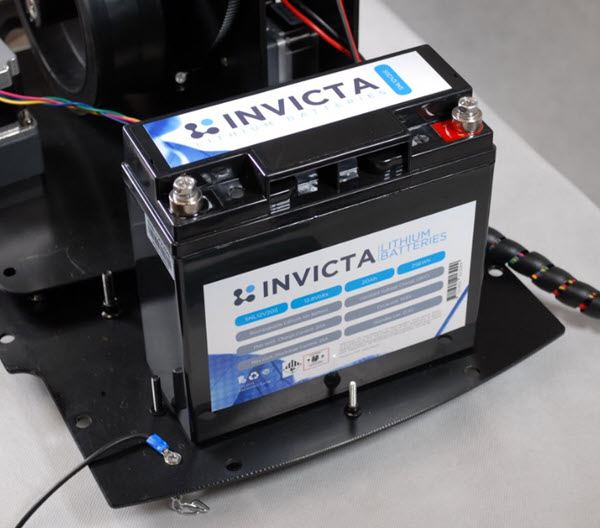
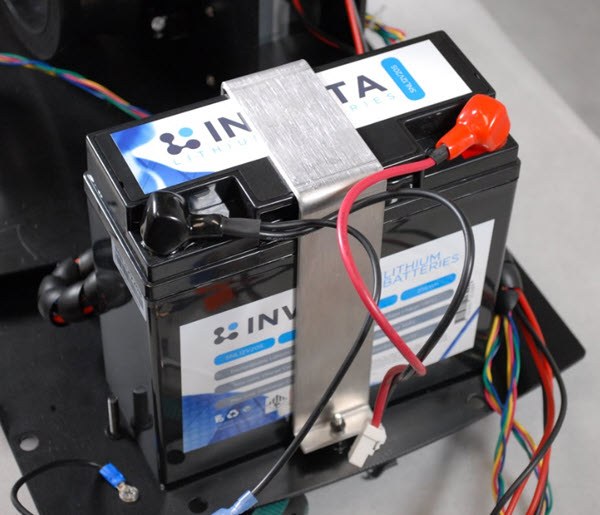
Step 2: After you have removed the machine body, identify the n-shaped battery brace located on the rear end of the machine.

Step 3: Skip this step if you are replacing an existing battery. If you are installing a battery for the first time into the machine, then the n-shaped brace will be empty. You will need to cut the cable tie holding the internal battery wires to separate them from the brace.

Step 4: On the rear side of the n-shape brace you will find 2 cable clips holding the motor wires. These wires would need to be removed from the clips by lifting the plastic strap and pushing it towards the wires. You can then remove the motor wires paying attention to how they would need to be reinstalled later.

Step 5: If you are installing a new battery into a machine which has never had one, you can skip this step. If you are replacing an existing battery, then remove each of the terminal wires from the battery using your Philips Screwdriver.

Step 6: Use the 7mm hex nut driver to unscrew the nuts on each side of the n-shaped brace. Each bolt will have one spring washer and one nut on it.


Step 7: Once the nut & spring washer have been removed, lift the brace upwards to remove it from the base. If a battery was inside the brace, you can remove this too.
Step 8: Place the new battery in the centre of the brace position on the machine base and place the brace back on top.
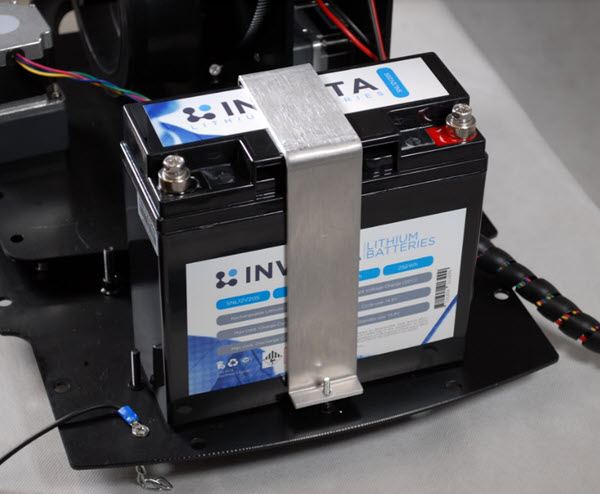
Step 9: Put the spring washer and nut back on the bolts and screw the nuts to hold the battery in place using the 7mm hex nut driver. Avoid over-tightening.
Step 10: Secure the motor wires back into the cable clips that were removed in Step 4.

Step 11: If you are replacing an existing battery, you can skip this step. If you are installing a battery into a machine for the first time (the machine has never had a battery in it before), then the wires separated from the brace in Step 3 may have a heat shrink sleeve protecting the eyelet connectors:
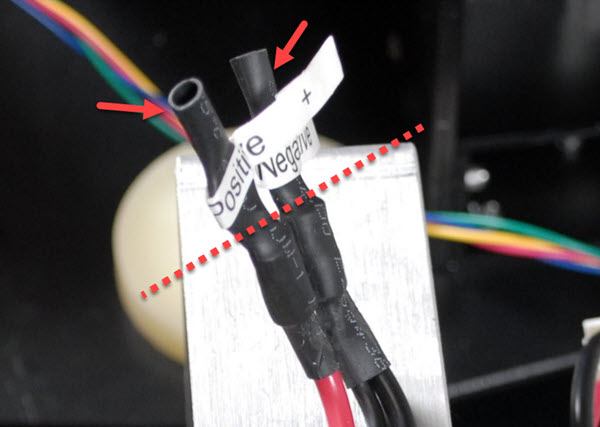
Use a pair of scissors to cut the top half of the heat shrink sleeves off each wire to expose the eyelet connectors so that it looks similar to the picture below:

Step 12: Install the red & black silicone terminal covers over each eyelet connector (matching the color). If you do not have these covers, you can use electrical tape in step 13 instead.
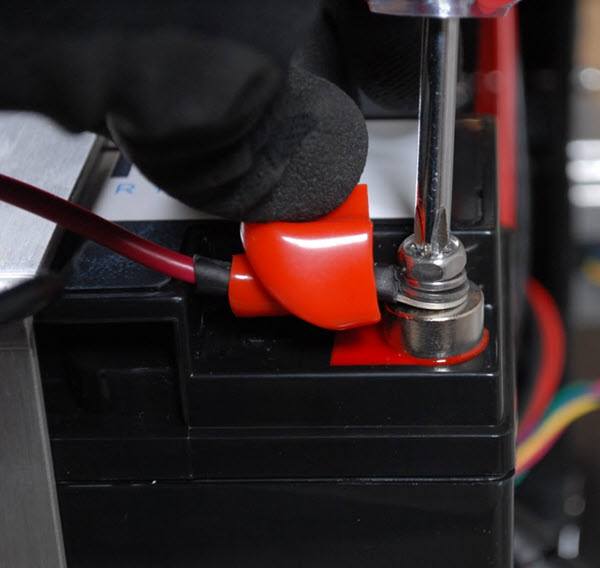
Step 13: Put the battery bolts through the eyelet connector to install onto the battery terminals. The red wire goes onto the positive terminal and the black wire goes onto the negative terminal. Screw the bolts into the battery terminals using the Philips Head Screwdriver. Push the silicone covers (from step 12) over the top of the terminals to protect and insulate them. If you do not have silicone covers, use electrical tape instead.
Step 14: Make sure the battery is securely held in place properly and that it cannot move at all.
Step 15: Reinstall the purple body and control panel back onto your machine following the steps in this KB article you used in Step 1.
You have now completed your battery installation.